Actions
The Coda node allows you to automate work in Coda, and integrate Coda with other applications. n8n has built-in support for a wide range of Coda features, including creating, getting, and deleting controls, formulas, tables, and views.
On this page, you'll find a list of operations the Coda node supports and links to more resources.
Credentials
Refer to Coda credentials for guidance on setting up authentication.
Examples and templates
For usage examples and templates to help you get started, take a look at n8n's Coda integrations list.
Basic Operations#
- Control
- Get a control
- Get all controls
- Formula
- Get a formula
- Get all formulas
- Table
- Create/Insert a row
- Delete one or multiple rows
- Get all columns
- Get all the rows
- Get a column
- Get a row
- Pushes a button
- View
- Delete view row
- Get a view
- Get all views
- Get all views columns
- Get all views rows
- Update row
- Push view button
Example Usage#
This workflow allows you to insert data into a new row for a table in Coda. You can also find the workflow on the website. This example usage workflow would use the following three nodes. - Start - Set - Coda
The final workflow should look like the following image.

1. Start node#
The start node exists by default when you create a new workflow.
2. Set node#
- Click on the Add Value button and select 'String' from the dropdown list.
- Enter
Column 1in the Name field. - Enter the value for the first column in the Value field.
- Repeat the first three steps of all the columns that you have in your Coda table.
Note: Here, we've used the default table in Coda, which has three columns namely Column 1, Column 2, and Column 3. Please make sure that the column names in the Name field matches the names of the table columns in Coda.
3. Coda node#
- First of all, you'll have to enter credentials for the Coda node. You can find out how to do that here.
- Select the name of your document from the Doc dropdown list.
- Select the name of your table from the Table dropdown list.
- Click on Execute Node to run the workflow.
Credentials
You can use these credentials to authenticate the following nodes with Coda.
Prerequisites#
Create a Coda account.
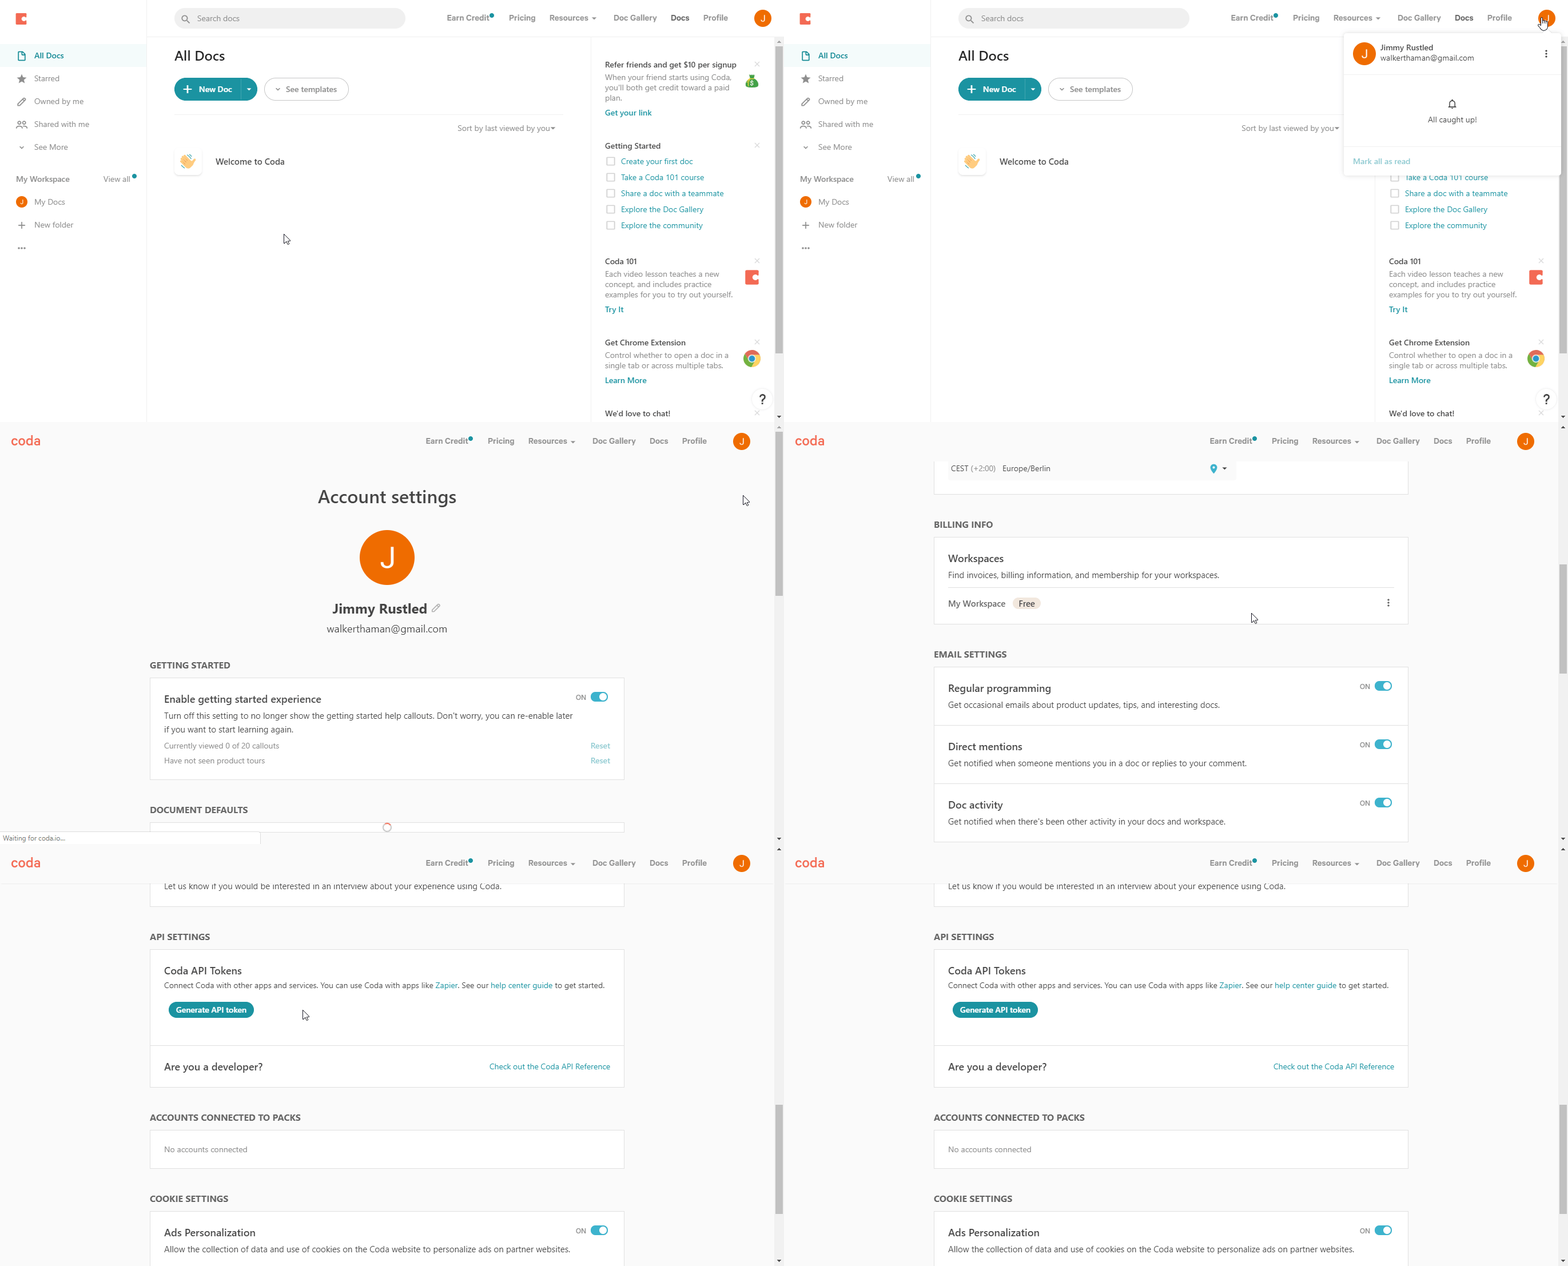
Using Access Token#
- Open your Coda dashboard.
- Click on your profile in the top right.
- Click on the 3 dots and then Account settings..
- Scroll down and click on "Generate" under API.
- Use selected API access token in your Coda node credentials in n8n.
