Actions
The Bubble node allows you to automate work in Bubble, and integrate Bubble with other applications. n8n has built-in support for a wide range of Bubble features, including creating, deleting, getting, and updating objects.
On this page, you'll find a list of operations the Bubble node supports and links to more resources.
Credentials
Refer to Bubble credentials for guidance on setting up authentication.
Examples the Templates
For usage examples and templates to help you get started, take a look at n8n's Bubble integrations list.
Basic Operations#
- Object
- Create
- Delete
- Get
- Get All
- Update
Example Usage#
This workflow allows you to create, update, and get an object from Bubble. You can also find the workflow on n8n.io. This example usage workflow would use the following nodes. - Start - Bubble
The final workflow should look like the following image.
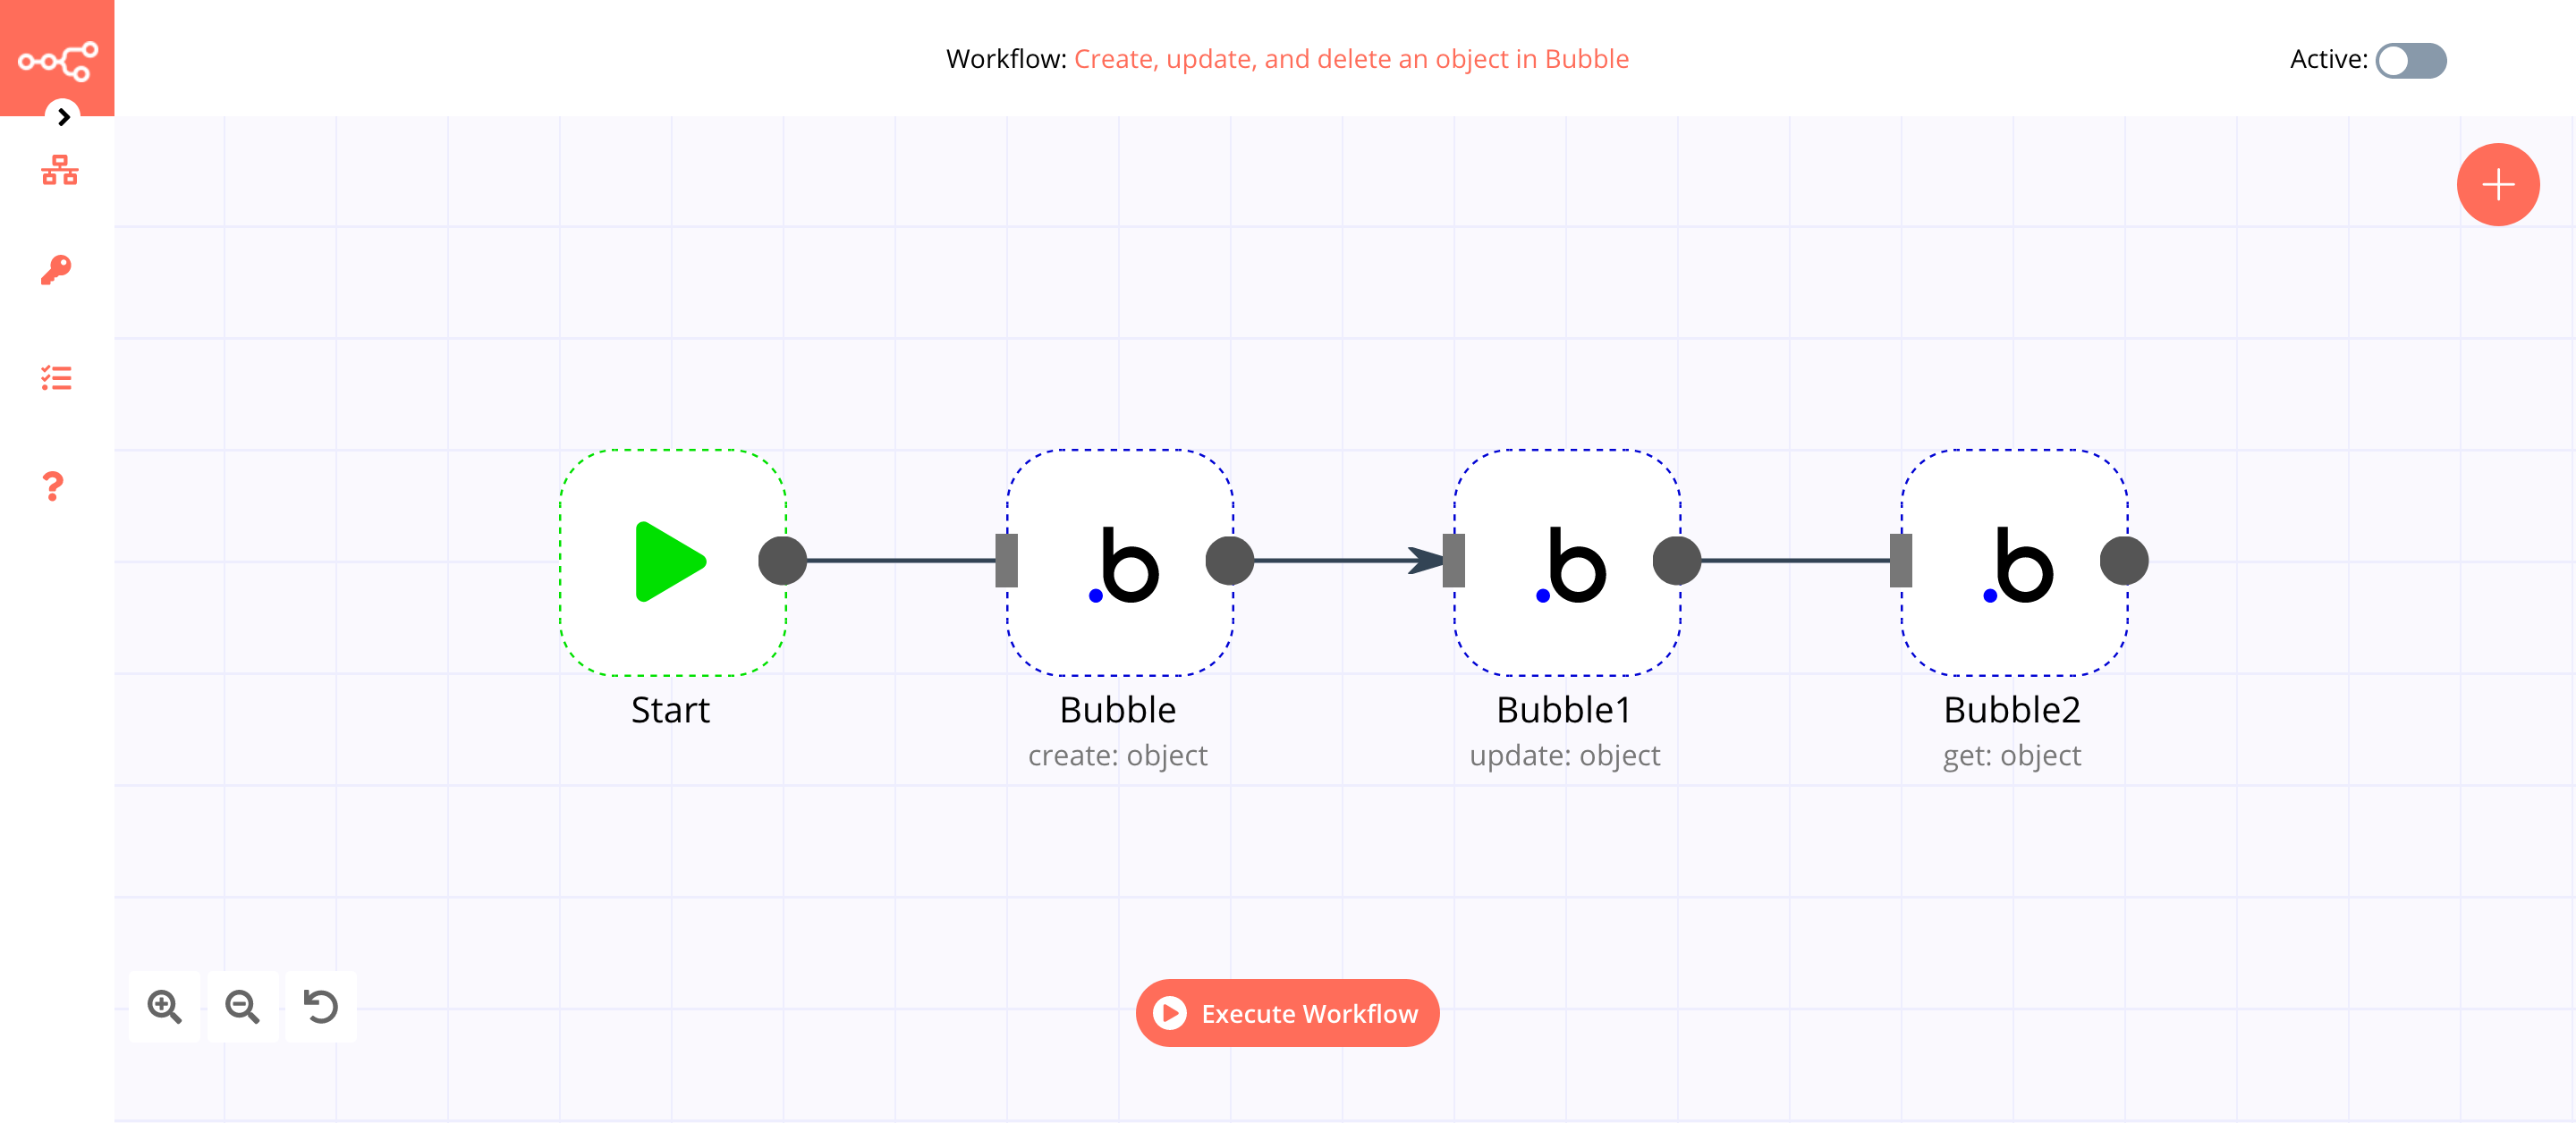
1. Start node#
The start node exists by default when you create a new workflow.
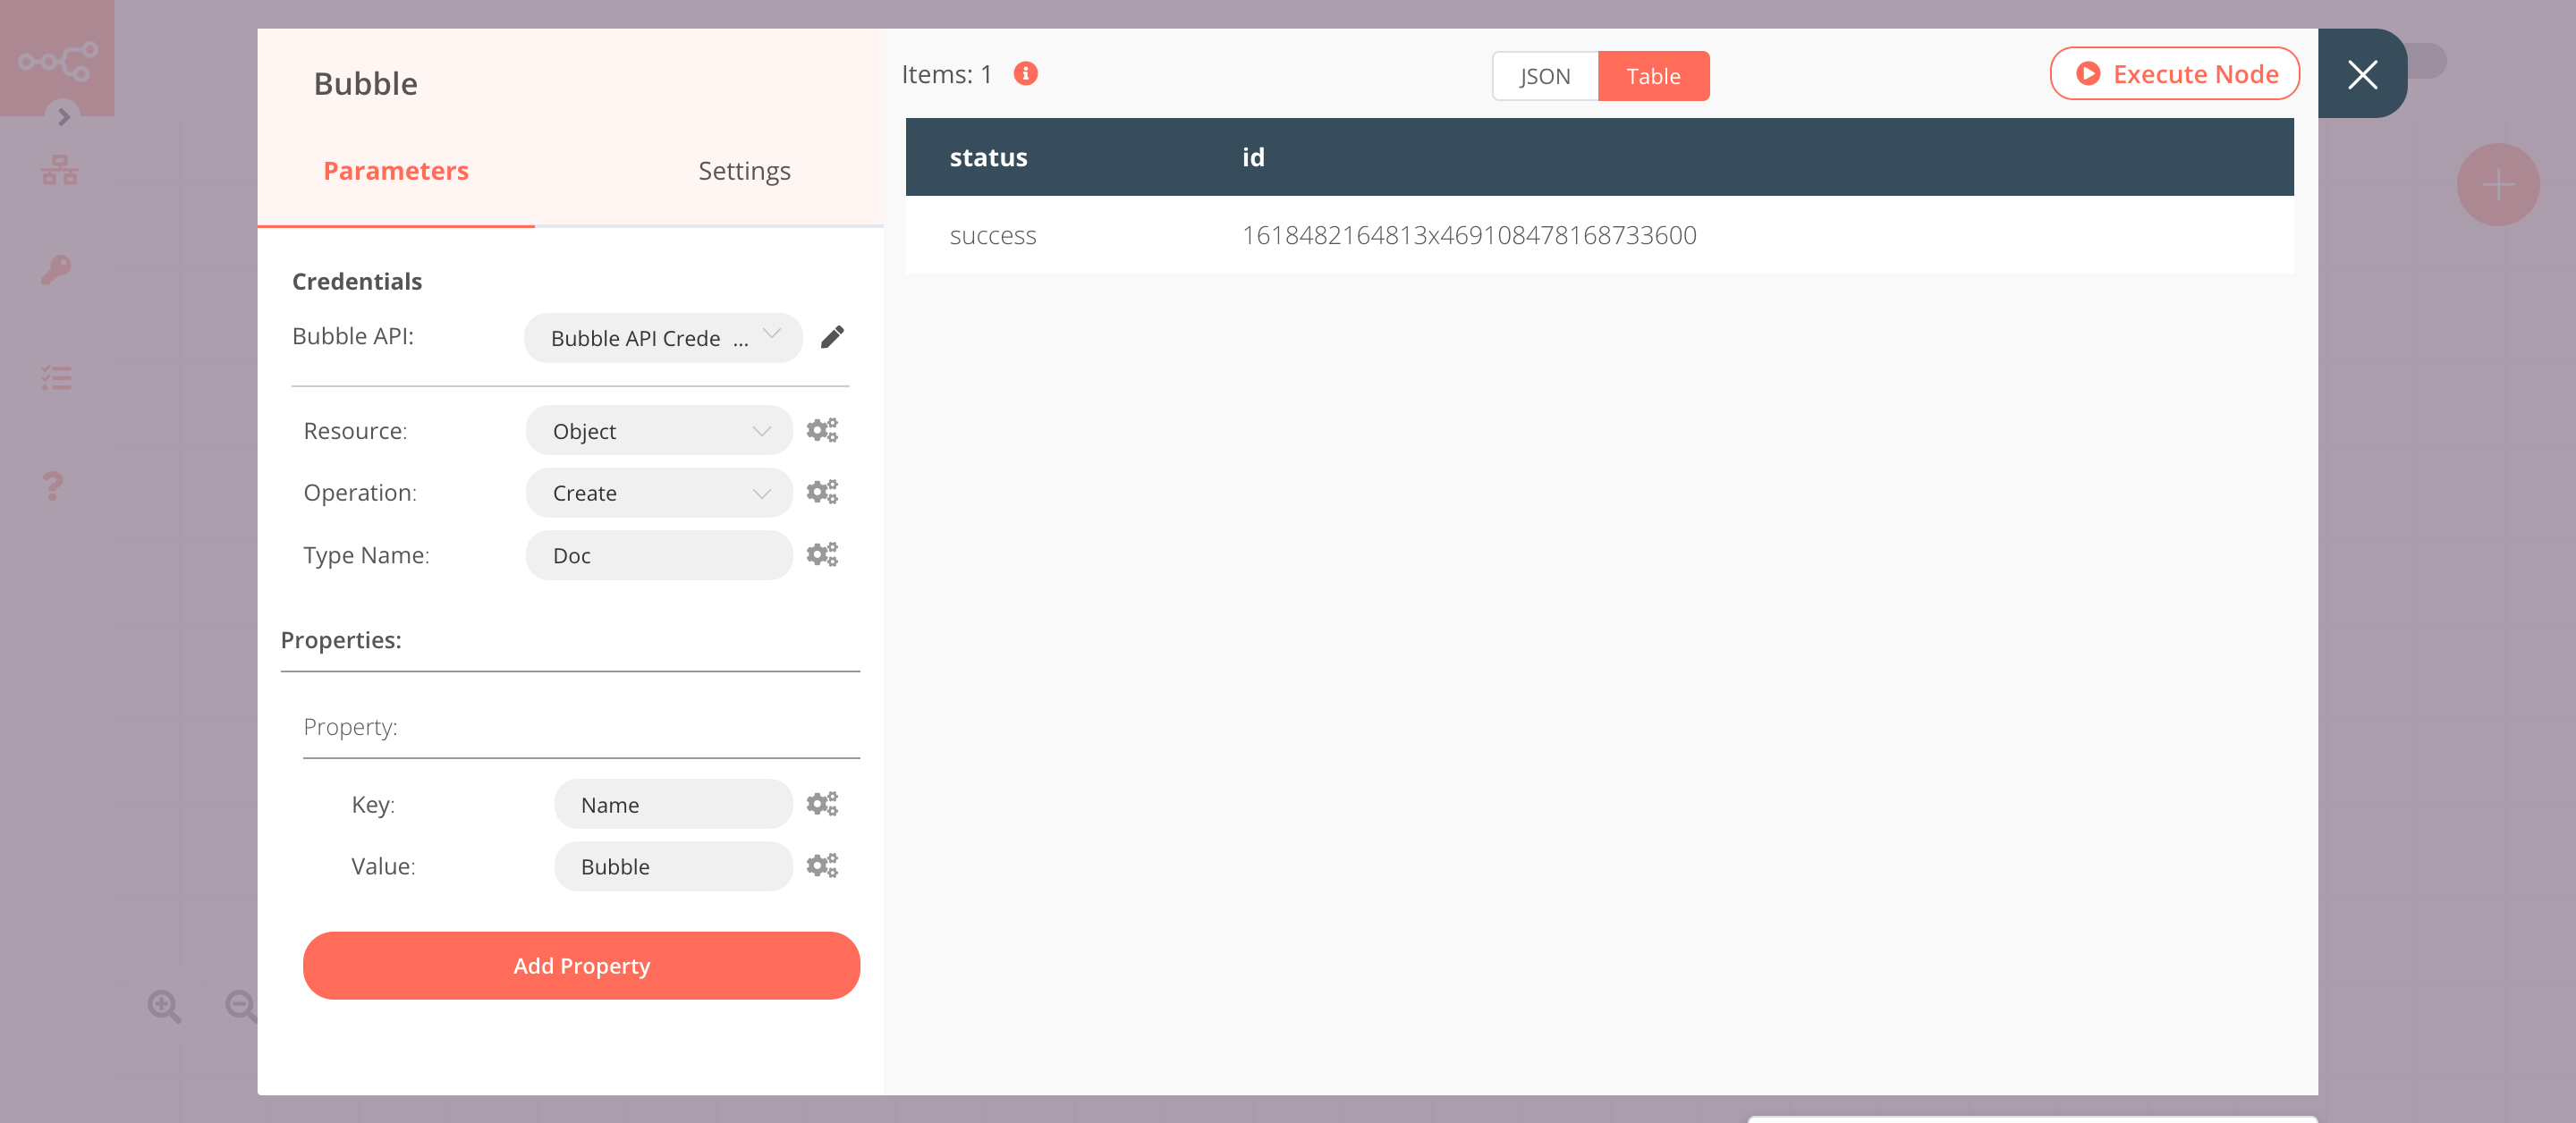
2. Bubble node (create: object)#
This node will create a new object of the type Doc in Bubble. If you want to create an object with a different type, use that type instead.
- First of all, you'll have to enter credentials for the Bubble node. You can find out how to do that here.
- Select 'Create' from the Operation dropdown list.
- Enter
Docin the Type Name field. - Click on the Add Property button.
- Enter
Namein the Key field. If you're using a different type, enter the field name present in the type. - Enter
Bubblein the Value field. - Click on Execute Node to run the node.
In the screenshot below, you will notice that the node creates a new object of the type Doc in Bubble.
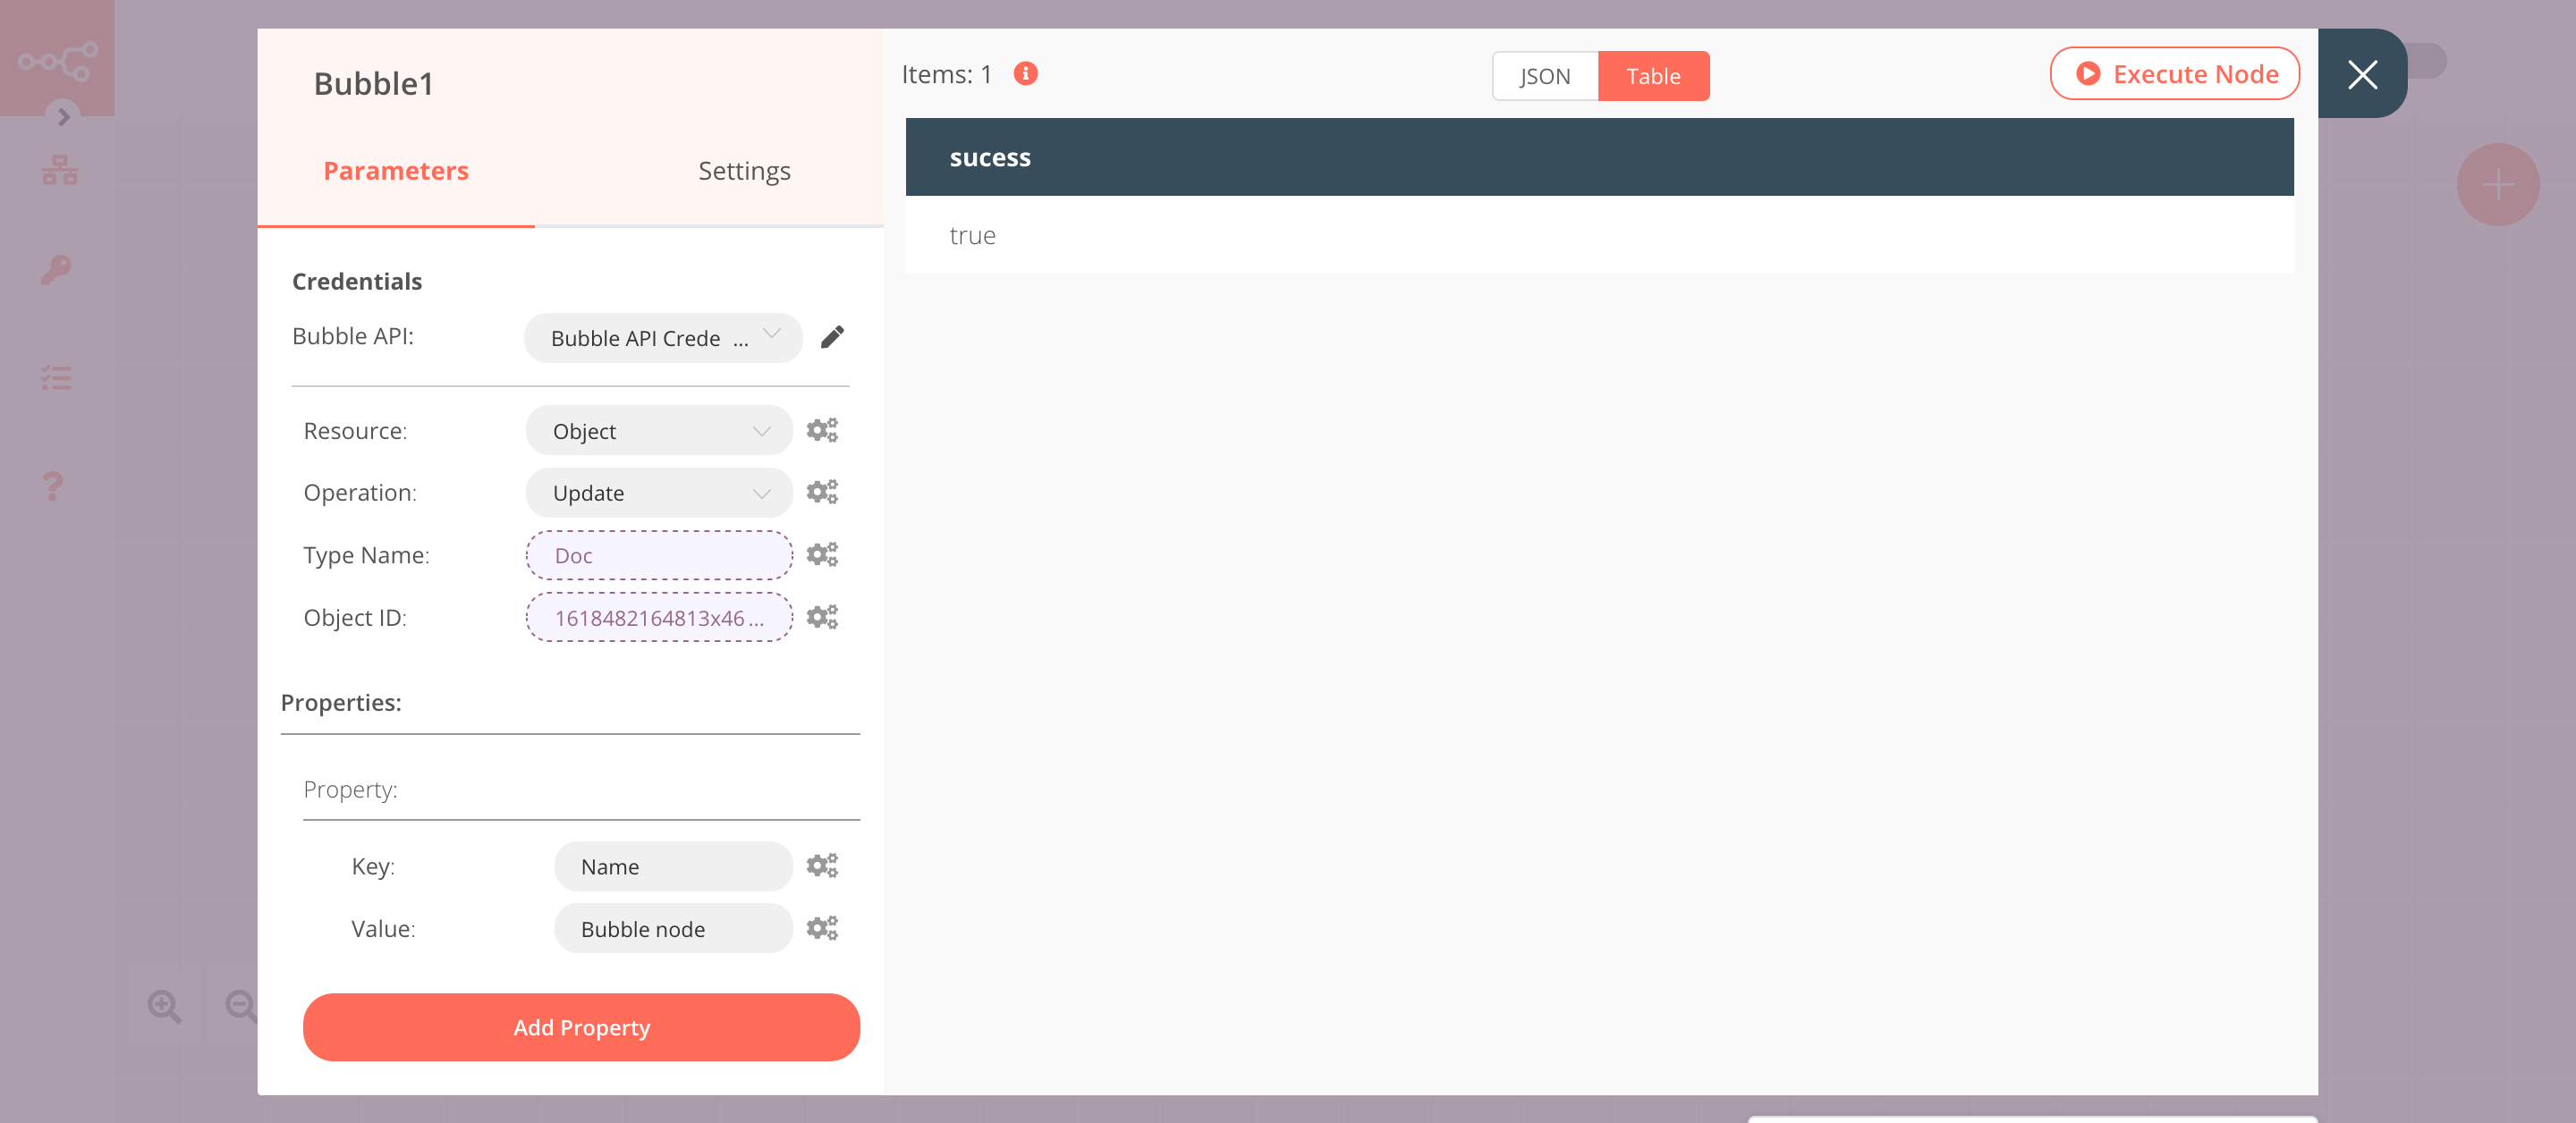
3. Bubble1 node (update: object)#
This node will update the object that we created using the previous node.
- Select the credentials that you entered in the previous Bubble node.
- Select 'Update' from the Operation dropdown list.
- Click on the gears icon next to the Type Name field and click on Add Expression.
- Select the following in the Variable Selector section: Nodes > Bubble > Parameters > typeName. You can also add the following expression:
{{$node["Bubble"].parameter["typeName"]}}. - Click on the gears icon next to the Object ID field and click on Add Expression.
- Select the following in the Variable Selector section: Current Node > Input Data > JSON > id. You can also add the following expression:
{{$json["id"]}}. - Click on the Add Property button.
- Enter
Namein the Key field. If you're using a different type, enter the field name present in the type. - Enter
Bubble nodein the Value field. - Click on Execute Node to run the node.
In the screenshot below, you will notice that the node updates the information of the object that got created previously.
4. Bubble2 node (get: object)#
This node will retrieve the information of the object that we created earlier.
- Select the credentials that you entered in the previous Bubble node.
- Click on the gears icon next to the Type Name field and click on Add Expression.
- Select the following in the Variable Selector section: Nodes > Bubble > Parameters > typeName. You can also add the following expression:
{{$node["Bubble"].parameter["typeName"]}}. - Click on the gears icon next to the Object ID field and click on Add Expression.
- Select the following in the Variable Selector section: Nodes > Bubble > Output Data > JSON > id. You can also add the following expression:
{{$node["Bubble"].json["id"]}}. - Click on Execute Node to run the node.
In the screenshot below, you will notice that the node retrieves the information of the object that we created earlier.

Credentials
You can use these credentials to authenticate the following nodes with Bubble.
Prerequisites#
Create a Bubble account.
Note: You need a Personal or a higher plan to get access to the Bubble API.
Using API Key#
- Open your Bubble dashboard page.
- Select an app under the My apps section to open the app.
- Click on Settings on the left-sidebar.
- Click on the API tab.
- Click on the Generate a new API token button.
- Enter a token name in the API Token Label field.
- Copy the displayed Private Key.
- Enter the name for your credentials in the Credentials Name field in the 'Bubble API' credentials in n8n.
- Paste the Private Key in the API Token field in the 'Bubble API' credentials in n8n.
- Enter the app name in the APP Name field.
- Select 'Development' from the Environment dropdown list. If you want to use the 'Live' environment, select 'Live' instead.
- Click on the Create button to create your credentials.
Note: If you're self-hosting your Bubble app, select 'Self-hosted' from the Hostingdropdown list. You will also need to enter the domain of your hosted instance in the Domain field.